 Sketchglass
How to go from tracing to freehand, one rung at a time
Do not jump straight from tracing to a blank page. Take the guide away a little at a time, and your hand keeps up.

In this guide
To go from tracing to freehand, remove the guide in small stages instead of all at once. Trace a drawing fully, then trace it with a faint guide, then use only a grid, then copy it by eye, then draw it from memory. Stay on each stage until it feels easy, and keep a traced version next to your freehand one so you can compare.
Tracing feels great. The lines come out clean and the drawing looks like the picture. Then you try the same drawing on a blank page and it looks wobbly and lopsided. That gap is normal, and it does not mean tracing was a waste of time.
The problem is the jump. Going from "every line is shown" to "nothing is shown" is a huge step. The fix is to build a ladder between the two, with small rungs you can actually climb. This guide gives you five rungs, a practice routine for each, and simple ways to check you are ready to move up.
Why the jump to a blank page feels so hard
When you trace, the picture does two jobs for you. It tells you where each line goes, and it tells you how big each part is compared with the others. Your hand only has to follow.
On a blank page you have to do both jobs yourself. You have to decide that the head is about as wide as the body, that the eye sits a little above the middle, and that the tail starts low. Those choices are what make a drawing look "right", and they are exactly what tracing hid from you.
So the goal is not to stop tracing. It is to hand those jobs back to yourself one at a time. If you are still wondering whether tracing is fair in the first place, our guide to whether tracing is cheating covers that question. This article picks up where it leaves off.
The five-rung ladder
Pick one simple drawing to practise with. A round, friendly character works best, like the baby T-Rex or a little ghost. Use the same drawing for every rung so you can see your progress clearly.
- Rung 1: Full trace. Trace the whole drawing with the guide clearly visible. Draw the big shapes first, then the details. Notice the order: which shape comes first, and which shapes touch.
- Rung 2: Faint guide. Trace the same drawing again, but make the guide much lighter so you can barely see it. Your hand has to fill in parts of each line on its own.
- Rung 3: Grid only. Draw a light grid on your paper and look at the picture with the same grid. Draw what sits in each square, one square at a time. The grid tells you where things go, but not the lines themselves.
- Rung 4: Copy by eye. Put the picture next to your paper, not over it. Draw it by looking back and forth. Start with the biggest shape and check its size against the paper before adding anything else.
- Rung 5: From memory. Put the picture away and draw the character from memory. Then look at the original and spot one thing you missed.
Stay on a rung until your drawing looks close to the traced one two times in a row. Some rungs will take one session. Others might take a week. Both are fine.
How to fade the guide when you trace with a phone
Rung 2 is easiest when you can control how strong the guide looks. With tracing paper you would need a thicker sheet or a paler print. With a phone you just turn it down.
In Sketchglass, the tracing view has an eye slider at the bottom that sets how strong the sketch looks over your paper. Start a session at full strength for rung 1, then slide it down for rung 2 until the lines are only just there. Lesson mode also shows each sketch in a few steps, so you only see one part at a time, which helps you learn the order of the shapes.
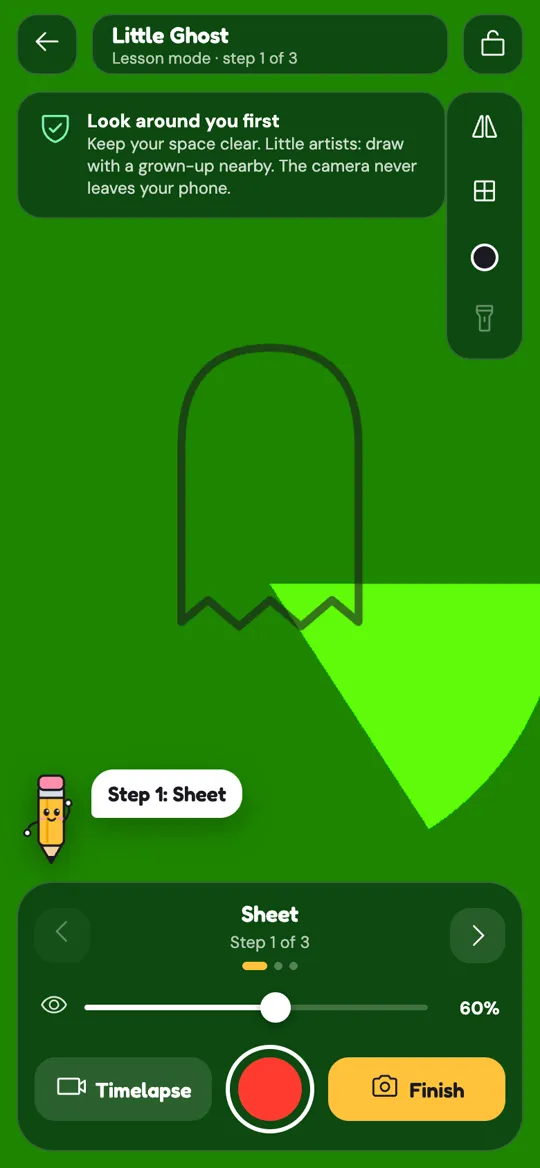
The grid button on the right side helps with rung 3. Turn it on while you trace once, so you see how the drawing sits in the squares. Then draw the same grid lightly on a fresh sheet and copy square by square without the phone. If your guide keeps sliding while you work, our phone setup guide for AR tracing has steady stand and lighting tips.
Compare, do not judge
The most useful habit on this ladder is putting your drawings side by side. Lay your traced version next to your freehand one and ask three questions:
- Is anything much bigger or smaller than in the traced version?
- Is anything in the wrong place, like an eye too low or a leg too far apart?
- Is a shape the wrong type, like an oval where there should be a circle?
Pick just one difference and fix only that one on your next try. Trying to fix everything at once usually makes the drawing worse.
Sketchglass makes the first comparison easy. When you finish a trace, the share card shows the original sketch next to a photo of your real drawing, like the Baby T-Rex card at the top of this page. Save it, then hold your freehand version up next to it.
A weekly plan to climb the ladder
If you like a plan, try this. Ten to fifteen minutes a day is enough.
- Days 1 and 2: Rung 1 and rung 2 with your chosen drawing. Trace it fully once, then twice with a faint guide.
- Days 3 and 4: Rung 3. Draw a grid and copy the drawing square by square. Do it twice.
- Days 5 and 6: Rung 4. Copy by eye with the picture beside your paper.
- Day 7: Rung 5. Draw it from memory, then compare with your day 1 trace.
The next week, pick a new drawing and start again. Each new subject climbs faster because the habits of checking size and position carry over.
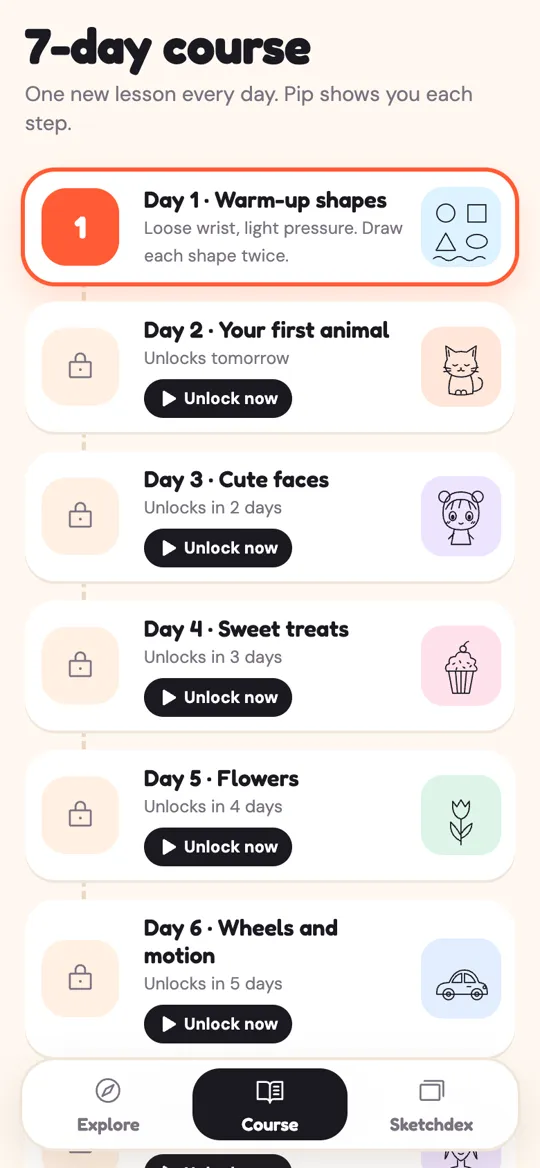
If you would rather follow lessons, the Sketchglass 7-day course gives you one new lesson a day, from warm-up shapes on day 1 to animals, faces, treats, flowers and wheels. Trace each lesson, then try the freehand rungs with the same subject. Our 7-day drawing practice plan also mixes tracing time with short freehand turns.
Common mistakes and how to fix them
Jumping rungs. If rung 4 looks messy, drop back to rung 3 for a day. Going back is part of climbing.
Starting with details. Beginners often draw the eye first, then find the head does not fit. Always start with the largest shape, then add smaller ones inside it.
Choosing a hard first subject. Faces with realistic shading are tough. Round, simple characters are much easier to check by eye.
Erasing every line. Keep a few wrong lines faint and draw the right one next to them. Seeing both teaches you what changed.
Only ever tracing new pictures. Tracing many different sketches is fun, but repeating one drawing through the rungs is what builds freehand skill.
FAQ
How long does it take to go from tracing to freehand?
There is no fixed time. Some people move up a rung every day, others need a week per rung. Stay on each rung until your drawing looks close to the traced version twice in a row.
Should I stop tracing completely once I can draw freehand?
No. Many artists still trace or transfer their own sketches to get a clean final drawing. Freehand practice and tracing can live side by side; just keep doing both.
What is the best first drawing to practise freehand?
Pick something round and simple, like a cartoon dinosaur, a ghost or a cat face. Simple shapes make it easy to see what is bigger, smaller or in the wrong place.
Does a grid count as tracing?
Not really. A grid only tells you roughly where things go. You still draw every line yourself, which makes it a good middle step between tracing and copying by eye.
Can kids use this ladder too?
Yes. Short sessions and a favourite character work well. Praise the steady lines on the traced version, then ask them to draw just one part again without the guide.