 Sketchglass
Shading basics for beginners: from flat outline to soft, round shapes
Shading is just light and dark placed on purpose. Pick a light direction, learn a few tones and build them up gently, and a flat drawing starts to look solid.

In this guide
Shading means adding light and dark tones so a flat outline looks round and solid. Start by choosing where the light comes from, then practise a value scale of five tones from white to dark. Build tone in light layers instead of pressing hard, keep the side facing the light pale, and add a small cast shadow where the object meets the ground. A sphere is the best first shape to practise on.
An outline tells you what something is. Shading tells you what it feels like: round, flat, soft or shiny, near or far.
Many beginners skip it or scribble dark patches that look dirty. But shading follows a few simple rules, and the same moves work on a ball, a cat or a cupcake.
These shading basics for beginners cover light and shadow, tools, three ways to make tone, a sphere exercise and shading a traced drawing.
Start with the light
Every shaded drawing begins with one decision: where is the light coming from?
Pick a direction, for example the top left, and keep it for the whole drawing. Draw a small sun in the corner as a reminder.
On any rounded object you will then find five areas:
- Highlight. The brightest spot, facing the light. Often you leave it as plain paper.
- Light tone. The side turned towards the light.
- Core shadow. The darkest band on the object, where it turns away from the light.
- Reflected light. A slightly lighter strip at the very edge of the shadow side, where light bounces back up from the table.
- Cast shadow. The shadow the object throws onto the ground, on the side away from the light. It is darkest right where the object touches the surface.
You do not need all five every time. Light side, shadow side and a cast shadow already make a big difference.
Tools you actually need
You can learn shading with very little.
- An HB pencil for light and middle tones.
- A softer pencil, such as a 2B or 4B, for the darkest areas. Soft pencils make darker marks with less pressure.
- An eraser. A kneaded eraser is handy because you can press it onto a tone to lift it a little lighter, or shape it to a point for highlights.
- A tissue or paper stump for blending, if you want smooth tones.
- Plain paper. Printer paper is fine for practice.
Only one ordinary pencil? That works too: control tone with pressure and layers.
Make a 5-step value scale
"Value" means how light or dark a tone is. A value scale trains your hand to make the same tone on purpose. It takes about five minutes.
- Draw a strip of five boxes side by side, each about the size of a stamp.
- Leave the first box white. That is your lightest value: the paper itself.
- Fill the last box as dark as you can, using a soft pencil and several layers rather than one hard press.
- Fill the middle box with a tone halfway between the two.
- Fill the second and fourth boxes with tones halfway between their neighbours.
- Squint at the strip. Each box should step evenly from light to dark. If two boxes look the same, adjust one of them.
Keep this strip next to you while you shade. Before you darken an area, ask which box it matches.
Three easy ways to make tone
There are many pencil shading techniques, but beginners only need three.
- Hatching. Rows of short parallel lines. Lines close together look dark, lines far apart look light. It is quick and it looks lively.
- Cross-hatching. Hatching, then a second layer of lines at an angle across the first. Add a third or fourth layer for very dark areas.
- Smooth tone. Small, light back-and-forth strokes or tiny circles, packed close together, built up in layers. Blend gently with a tissue at the end if you want it softer.
Whichever you choose, follow the form: on a round object, curve your lines around the shape instead of straight across.
Clean shading depends on clean strokes, so if your hatching looks hairy, the grip and arm tips in our guide to drawing smooth, confident lines will help here too.
Your first shaded sphere
A ball is the classic first exercise because it shows every part of light and shadow.
- Draw a circle lightly. Trace a cup or roll of tape if you like.
- Mark the light with a small arrow at the top left.
- Place the highlight. Lightly outline a small oval near the top left, inside the circle. Do not shade inside it.
- Find the core shadow. Draw a faint curved line across the lower right part of the ball, following its shape like a crescent.
- Lay a light tone over the whole ball except the highlight, curving your strokes around it.
- Darken the shadow side in layers, darkest along the core shadow line.
- Keep the very edge on the shadow side a touch lighter for reflected light.
- Add the cast shadow. Shade an oval on the ground to the lower right. Make it darkest where it touches the ball and softer as it moves away.
- Erase the outline where it looks too hard, so the ball's edge is made by tone instead of a line.
Your first ball may look lumpy. Draw three more.
Shading a drawing you traced
If you draw by tracing, shading is where you add your own touch.
In an AR drawing app like Sketchglass, you prop your phone about a hand above your paper, a sketch appears over the page on screen, and you trace it with your own pencil, step by step. The sketches are clean line art, so a finished trace is a good outline to shade. The first course lesson, Warm-up shapes, even asks for light pressure.
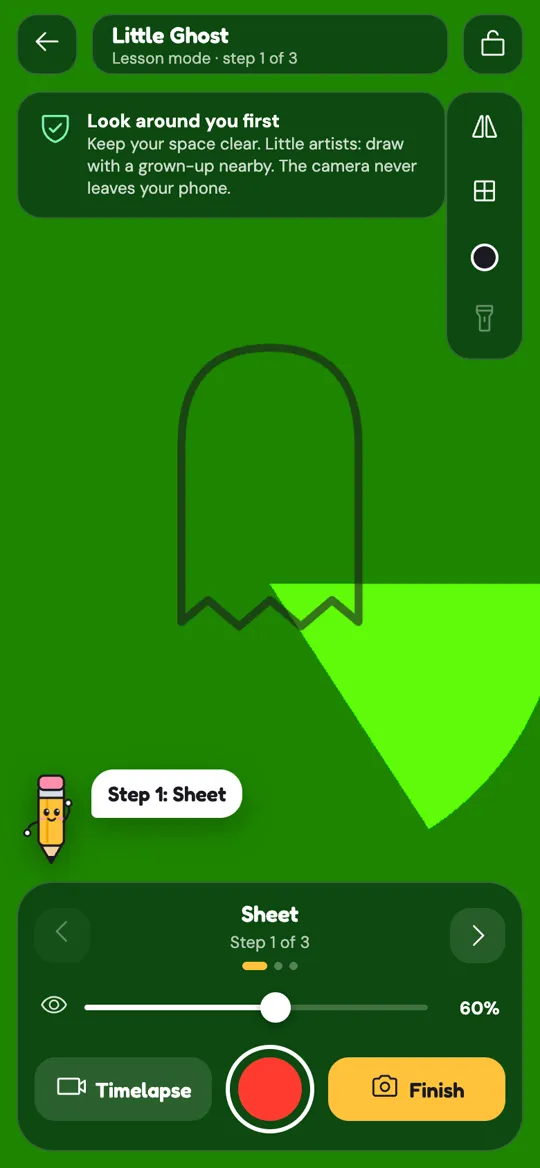
Here is a simple routine for a traced drawing, such as a sleepy cat:
- Finish the trace lightly. Keep your lines soft so shading can sit over them.
- Put the phone away. Shading is easier when you look straight at the paper.
- Choose the light and draw your little sun in the corner.
- Break the drawing into simple shapes. A cat's head is roughly a ball, its body an oval.
- Shade each shape like a sphere, keeping the same light direction for all of them.
- Add one cast shadow under the whole drawing to sit it on the ground.
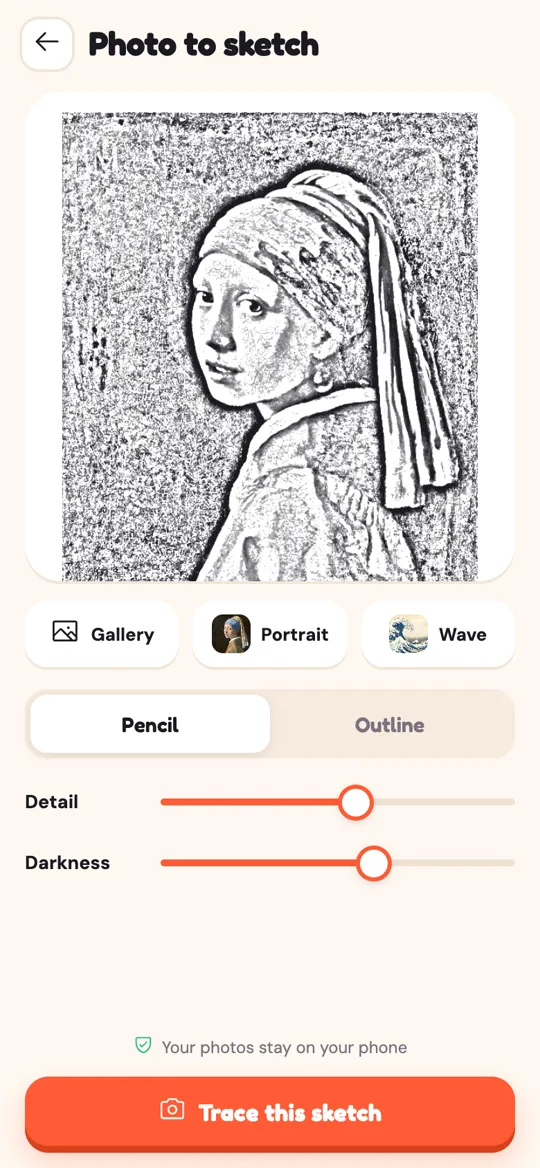
For a reference of where darks go, Photo to sketch turns a gallery picture into line art. Its Pencil style keeps some tones, and the Darkness slider makes them stronger or softer. The photo stays on your phone.
When you feel ready to shade without a guide at all, our guide to going from tracing to freehand shows how to fade the help step by step.
Common shading mistakes and quick fixes
- Everything is the same grey. Use your value scale. Make sure you have real white and real dark in the drawing.
- The drawing looks dirty. Your hand is smudging the graphite. Rest it on a scrap of paper while you work.
- Shadows on both sides. You lost track of the light. Check your little sun and erase the wrong side.
- Hard outlines everywhere. Let tone make the edges. Soften or erase outlines on the lit side.
- Blending too early. Get the lights and darks right first, then blend last.
FAQ
What is the easiest shading technique for beginners?
Hatching is the easiest place to start. You only draw rows of short parallel lines, closer together for dark areas and further apart for light areas, so it is easy to control.
Which pencil is best for shading?
An HB pencil is good for light and middle tones, and a softer pencil such as a 2B or 4B makes darker tones with less pressure. One ordinary pencil still works if you build tone in layers.
Why does my shading look patchy?
Patchy shading usually comes from pressing hard, changing stroke direction often or stopping and starting in different places. Use light, even strokes, overlap them and build the tone up in several layers.
Should I blend my shading with my finger?
It is better not to. Fingers leave skin oil on the paper, which can make blotchy marks. A tissue or a paper blending stump gives a cleaner, more even result.
Does Sketchglass teach shading?
Sketchglass sketches are clean line art that you trace on real paper, step by step. Shading is something you add yourself afterwards, which makes a finished trace a good outline to practise on. Sketchglass is coming soon to Google Play.