 Sketchglass
Pip the pencil: how step-by-step drawing lessons work in Sketchglass
Every sketch in Sketchglass is cut into a few small steps, and a cheerful pencil called Pip walks you through them. Here is what happens on screen, from the first line to the finished card.
In this guide
In Sketchglass, every sketch is split into a few named steps, and Pip the pencil guides you through them. Only the current step shows on your paper, it draws itself in so you can see where to start, and finished steps fade back. You move with the arrows under the sketch, Pip cheers you on at each step, and the last step ends the lesson with stars and a card. A 7-day course adds one new lesson each day.
A whole drawing can feel like a lot when it sits on your paper all at once. Where do you start? Beginners often freeze, or rush and lose their place.
Step-by-step drawing lessons fix that by showing one small part at a time. This guide explains how lessons work in Sketchglass: who Pip is, what you see on screen, how to move between steps, how the 7-day course unlocks, and what happens when you finish.
Who is Pip the pencil?
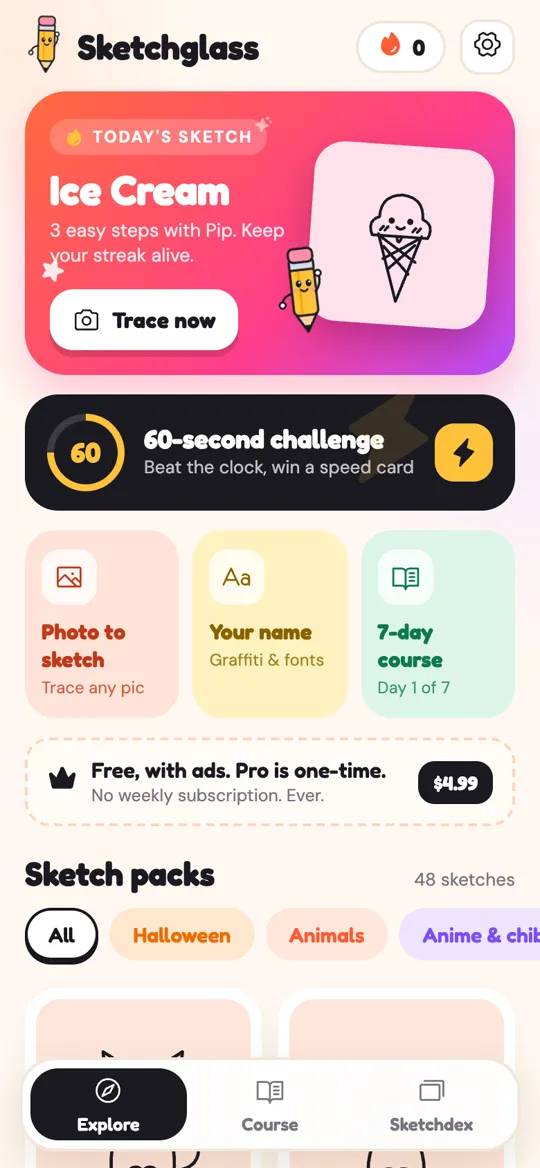
Pip is the drawing buddy in Sketchglass, a small yellow pencil with a pink eraser, big eyes and a wave. Pip sits in the corner of the tracing screen and talks to you through a little speech bubble.
Pip has three jobs:
- Name the step. When a lesson starts, Pip tells you what you are drawing first, for example "Step 1: Sheet" for the Little Ghost.
- Cheer you on. Each time you move to the next step, Pip jumps and says something kind, like "Nice line!" or "Steady hand!", then tells you what comes next.
- Keep you company. Pip also shows up on the home screen next to today's sketch and in the course.
Pip does not mark your lines while you draw. The tone is gentle on purpose: the goal is to keep you drawing.
What lesson mode looks like
When you open a sketch with more than one step, the top of the screen says Lesson mode and shows which step you are on, such as "step 1 of 3". The step panel sits at the bottom, with the step name, a "Step 1 of 3" counter and a row of small dots.
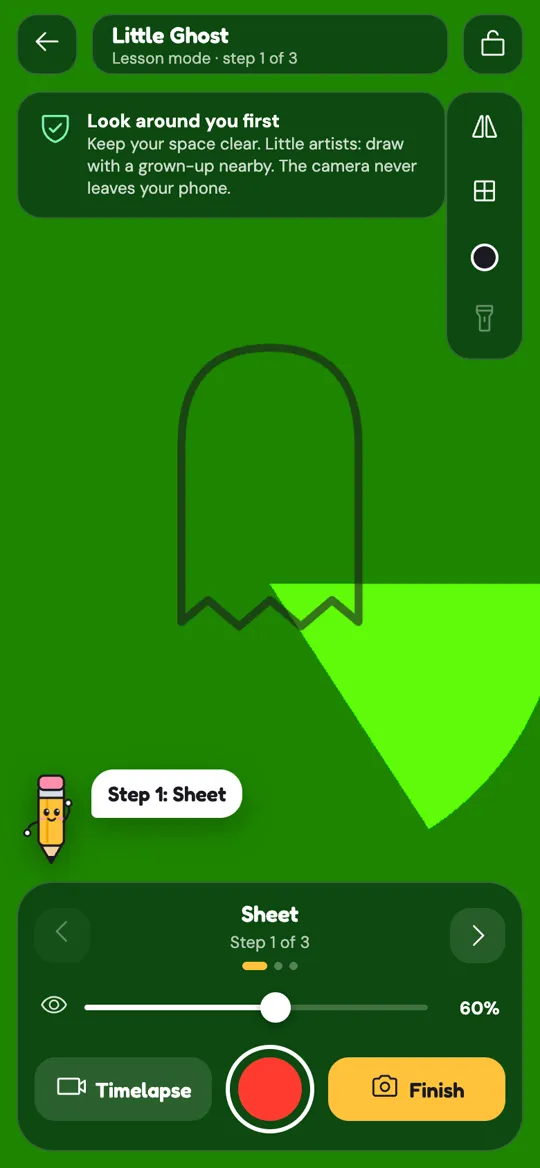
Three things happen to the sketch itself:
- The current step draws itself in. Its lines animate onto the paper, so you can see where each stroke starts and which way it goes.
- Earlier steps fade back. Lines you have already traced stay on screen, but lighter, so they do not distract you.
- Later steps stay hidden. You only see what you need right now, which keeps the view clean.
Each step has a real name, not just a number. The Little Ghost, for example, goes Sheet, then Face, then Arms and sparkles. Names like these tell you what you are drawing, which makes it easier to think in shapes instead of copying random lines.
How to follow a lesson, step by step
Here is the full flow, from opening a sketch to finishing it.
- Set up your phone and paper. Prop the phone on a glass or a stack of books, about a hand above your paper. If you are new to this, our guide to setting up your phone for AR tracing covers height and light.
- Pick a sketch. Choose today's sketch, a sketch pack, or a day in the course.
- Read the safety card. Before the camera starts, Sketchglass shows a short "Safety first" card: draw with a grown-up nearby, stay seated and keep your space clear, and the camera picture never leaves your phone. Tap "I understand" to continue.
- Place and lock the sketch. Pinch, drag and twist it until it sits where you want it on the paper, then tap the lock so it stays put.
- Trace the current step. Watch it draw itself in, then follow the lines with your pencil. Press lightly at first.
- Tap the right arrow. Pip cheers, the finished step fades back and the next step draws in. Use the left arrow if you want to look at an earlier step again.
- Finish on the last step. On the final step the right arrow turns into a check mark. Tap it (or the yellow Finish button) when your drawing is done.
If you want to change how the lines look while you trace, the opacity slider and line colour button are right there. Our guide to the tracing tools explains each one.
The 7-day course: one new lesson a day
The Course tab holds a short drawing course. One new lesson opens each day, and each comes with a single tip. Pip shows you each step, just like any other sketch.
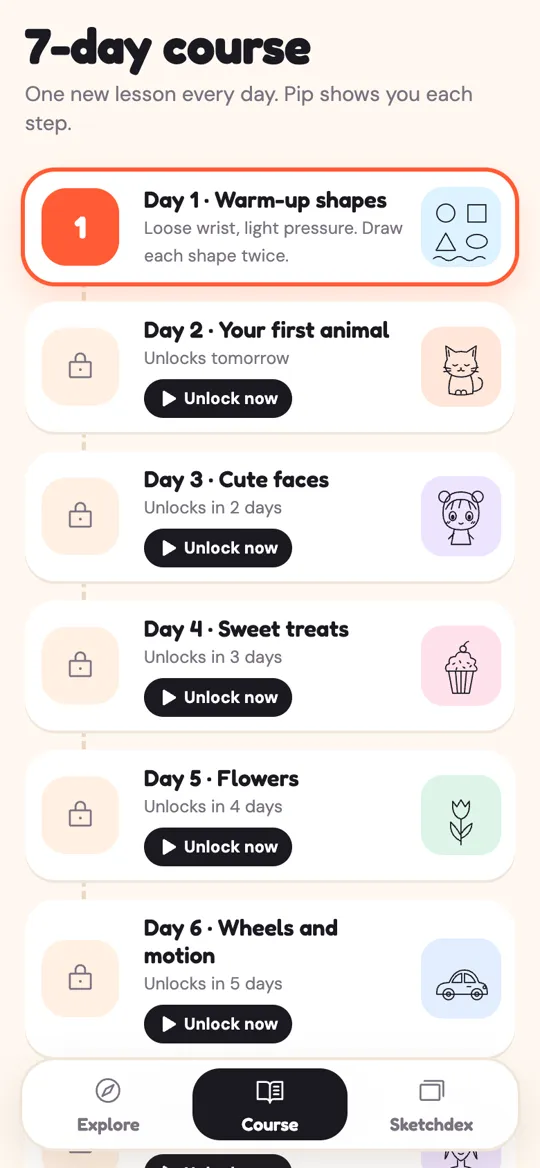
The seven lessons are:
- Day 1, Warm-up shapes: circles, squares, triangles, ovals and a wavy line.
- Day 2, Your first animal: a cat. Big shapes first, details last.
- Day 3, Cute faces: a chibi character, with the eyes halfway down the head.
- Day 4, Sweet treats: a cupcake with wavy, soft-looking frosting.
- Day 5, Flowers: a tulip with a gently curved stem.
- Day 6, Wheels and motion: a car. Circles first, then connect them.
- Day 7, Anime portrait: hair drawn as big shapes, not single strands.
Locked days say "Unlocks tomorrow" or "Unlocks in 3 days". If you do not want to wait, you can open a day early by watching a short video, or Pro (a one-time purchase) opens every lesson at once. A finished day gets a check mark and the next open day is highlighted.
Want to follow the same order with only paper and a pencil? Our 7-day drawing practice plan turns the course into daily sessions you can do anywhere.
What happens when you finish
When you tap the check mark, Sketchglass looks at a photo of your paper and compares your lines with the sketch. You get a result screen with 1 to 3 stars, a short title like "Masterpiece!" and a note on how much of the sketch your lines matched.
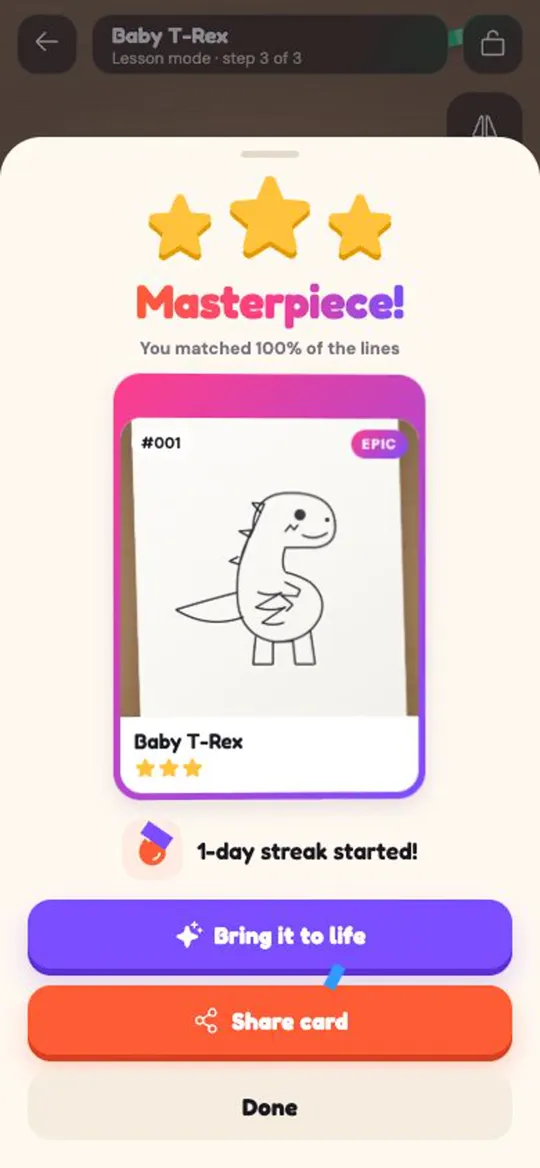
Your drawing becomes a card in your Sketchdex, framed as Common, Rare, Epic or Legendary depending on your stars. If you finish the Day 7 anime portrait with three stars, that card is Legendary. Our guide to Sketchdex cards and rarities explains the rest.
From the result screen you can also tap Bring it to life to make your drawing dance, bounce, wiggle or walk across your desk, as shown in make your drawing come alive. Drawing on a new day also keeps your streak going.
When there are no steps
Not everything in Sketchglass is a multi-step lesson. When you trace your name in one of the 8 fonts, or a picture you turned into line art with photo to sketch, the whole thing appears at once and the step panel is hidden. Pip simply says "Let's trace it!" and you trace as normal. The 60-second challenge has a clock instead, and Pip starts it with a quick "Go go go!".
Tips for getting the most out of lessons
- Do not skip ahead. The step order usually goes big shapes first, then faces and details. Following it keeps proportions right.
- Go back if you need to. The left arrow is there for a reason. Checking an earlier step costs nothing.
- Repeat a lesson. You can trace the same sketch again on a new sheet. Your second try is often smoother than your first.
FAQ
Who is Pip in Sketchglass?
Pip is a friendly cartoon pencil who acts as your drawing buddy. Pip names each step, cheers when you move on and appears on the home screen and in the course.
How many steps does a lesson have?
Most sketches are split into a few named steps, such as Sheet, Face, and Arms and sparkles for the Little Ghost. The panel at the bottom shows the current step and the total.
Can I go back to an earlier step?
Yes. Tap the left arrow in the step panel to return to the previous step. The right arrow takes you forward, and on the last step it turns into a check mark to finish.
Do I have to wait a day for each course lesson?
One new lesson opens each day. You can open a locked day early by watching a short video, and Pro, a one-time purchase, opens every lesson.
Does Pip check my drawing while I trace?
No. Pip guides and cheers you on during the lesson. Your lines are only compared with the sketch when you finish, which gives you 1 to 3 stars and a card.
Is the camera picture uploaded during a lesson?
No. The camera view and the photo of your finished drawing are processed on your phone and never uploaded. There is no account.